Failure analysis process is used when something fails, and we need to know how and why it happened. The process itself may be very complex with numerous different analysis methods and tools. However, the overall process itself is typically quite simple and does not markedly change whether we are trying to figure out why a beer can has exploded (like the one in the picture above) or what happened to a complex electrical unit which has stopped working.
Commonly, the process can be described with four steps which you may need to repeat multiple times, especially with complicated failures which may involve several failure types.

Step 1. Data collection
The first part of the failure analysis process is the collection of data. The purpose of this part is to gather as much information as possible of the failure and of the factors related to it. Basically, this means verifying what has failed, how the failure happened or how it was observed, where did the failure occur, when did it happen, was the product used as it should be or has it been used at all, or anything else specific to the failure. In addition to the failure, it is important to gather as much information as possible of the failed device or structure. For example, what kind of materials, components, and manufacturing processes has been used.

Exploded beer can
Failure analysis often starts in a hurry, especially, if something critical has failed. Because of this, finding enough time to collect all necessary data can be a challenge. Furthermore, finding correct information can be quite difficult or even impossible. However, data collection is a crucial part of the process, because without enough data there is a major risk of that one uses unsuitable analysis methods or draws wrong conclusions.
Step 2. Hypothesis of the cause
After the data has been gathered, it will be used to make a guess of what could have happened. In addition to the collected data, we often need to use literary data, former experience, and history data from similar products to support our hypothesis.
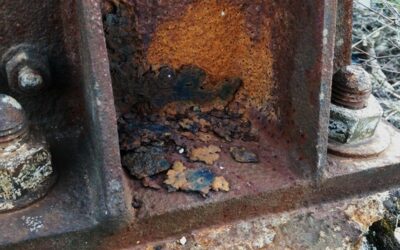
Sometimes making such a hypothesis is very easy and just by using visual inspection we can see the probable cause for the failure. For example, there could be a crack which is clearly due to fatigue or obvious corrosion which has caused an electrical breakdown. However, it is common, especially in complex systems, that there are several possibilities and making a hypothesis of the cause is very difficult. It is even possible that we will start by eliminating potential causes just to get more information.
Even though making a hypothesis can be challenge, it is important since we can use it to move to the next stage i.e. we determine which analysis methods should be used.
Step 3. Analysis using various analytical methods

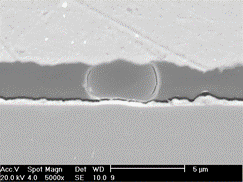
Preparation of cross-sections and their analysis with microscopic methods is often very effective way to analyse failures. However, cross-sectioning usually destroys the sample and therefore should be done only after other less destructive methods have been used.
The next stage of the process is to use suitable methods to analyse the failed product. There are lots of different methods we can use to do this. Some are quite straightforward and obvious, for example visual inspection is used to check what we are dealing with and in electrical systems some kind of electrical measurements are almost always used. However, often analysis methods are complex, require lots of experience and knowledge, and are expensive to use. Because of this, it is important to use the data from step 1 and the hypothesis from step 2 to decide which analysis methods to start with to ensure that they are both efficient and meaningful.
When the methods have been decided, the analysis should start with the least destructive methods. This way the failed samples are not destroyed and can be further analysed with other techniques if needed.
Moving to destructive techniques is often necessary after the non-destructive methods. This can be problematic, especially, if there is only one sample to analyse. It is possible that only one analysis can be conducted from the sample, since the analysis may fully destroy the sample. Consequently, it is vital to pick the right methods.
If you are unlucky, there are several failure mechanisms acting at the same time which can make the analysis very difficult. In such case you may just needs to make an educated guess and hope for the best. Sometimes it can also be useful to start by eliminating most of the potential causes and using the results to decide how to proceed.
Step 4. Analysis of the results and conclusions
After the data has been collected and the samples analysed, we analyse the results and draw conclusions i.e. determine what was the cause of the failure. Then we can write a report including all relevant data of the samples, description of used analysis techniques, results, and conclusions and the failure analysis process is complete.
However, in real world this might not be how the process goes. When we start to analyse the results or even before it, we can realise that we lack some critical data and we need to go back to step 1 to collect more information. Or the results given by various analytical methods are not conclusive and we need to use additional techniques and go back to step 3. Or the results indicate something unexpected, and we need to fix our hypothesis or maybe even start the whole process from the beginning. In practise this means that the failure analysis process often contains several cycles before it is finally concluded.
Finally, it is important to notice that more often than not there is considerable amount on uncertainty in the final results of the failure analysis even though it is well conducted. We can reduce the uncertainty by repeating the different parts – adding more analysis methods or even trying to replicate the failure mechanism. This can go on for a long time. Consequently, sometimes it is important to not only consider how to conduct the process but also to consider what is enough and when to stop it.


