This year we have discussed with almost every customer about the difficulty of getting components and the extremely long delivery times they have due to global component shortage. The lack of semiconductors has been a problem for a long time, but lately it seems that the availability is poor for a very wide range of components and also for raw materials.
In practice this means that more and more companies need to replace components and materials they have been successfully using to new ones which are available within reasonable time. If you need to do this, there is of course lots of factors to consider. One of the critical ones is the reliability of the new component compared to the old one. New component may not be good enough or it may have some problems which were not seen with the old one. Especially in demanding applications the risk for this is considerable and can be a major source of problems in the future.
Comparing old and new components
If you are replacing a critical component or material with a new one, you definitely should consider reliability issues and how to analyse them. From positive point of view, there is one important benefit when you are looking for a component or material to replace something that works well. This benefit is that you can use the old component as a reference in tests. Instead of trying to estimate the use life using reliability models or history reliability data, you can just compare the old and new and see how well their behaviour match.
There are lots of test methods which can be used to compare new and old components and materials.
Even though having the old component is a major advantage, it is not always straightforward to compare the old and new components or materials. The comparison might require quite a lot of testing and analysis which means that the comparison is both time consuming and expensive. However, the risk of using a poor component is huge especially in an expensive device with a long use life. Therefore, it makes sense to put up the effort to do proper comparison testing.
How to compare old and new?
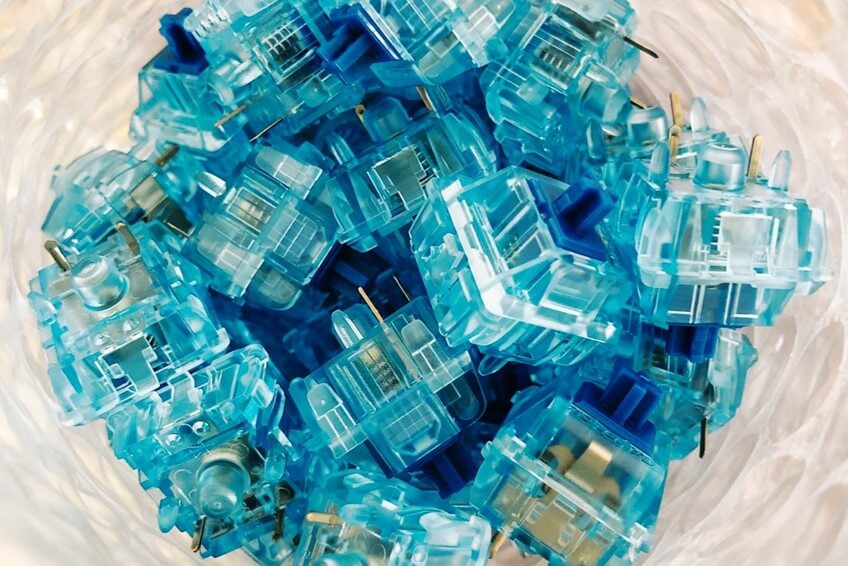
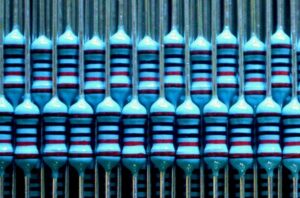
When you are thinking about how to compare the components or materials, the first thing to consider is the critical parameters for the studied application or device. For example, if you are replacing an electrical connector, it is vital to consider what are the most critical parameters for this particular component. Most likely the connector has critical electrical function, but its mechanical properties may also be very important and need to be considered. Moreover, the connector may be exposed for example to high temperature, fluctuation of temperature, humidity, or corrosive chemicals, which all need to be considered in test planning. On the basis of such facts, you can gather the most critical stresses and properties and find the most important test methods.
Connectors are often vulnerable to corrosion and this needs to be considered in test design.
As mentioned, in reliability testing having a reference is very useful. After testing, if you see changes or potential reliability issues, you can compare these to the old component. If the old one functions fine but the new has issues, it is easy to deduct that the new may be a potential reliability risk. This kind of testing and analysis, however, requires that the components or materials are quite similar. If you are considering something totally new with different structures and materials, for example, if the connector you are testing has very different metallurgy or polymer casing, the tests may affect them differently and the comparison of results may not be so straightforward.
Don’t over-accelerate!
Due to the lack of components, the decision to use a new component often needs to be done very quickly. This makes finding the most useful test conditions for comparison testing difficult. On one hand, you need the results as quickly as possible, but on the other hand, there is a limit to how much you can accelerate the tests.
Too high humidity and temperature may cause unexpected failures which are not seen in actual use conditions.
It is very important to find the suitable test conditions, and to do this it is important to know the components you are testing. For example, you may have to consider how high temperature or humidity level you can use to age your components without causing some strange and totally irrelevant failures, and thus making the test useless waste of time. This is easier to do, when you have some knowledge of the materials used in the components, so it is useful to gather as much information as is reasonably available.
Use customized tests
One nice feature about comparison testing is, that normally there is no need to use test standards, or you can more freely modify them. This means that the test can be optimized for the studied component and therefore, even relatively complex combinatory tests may be used. For example, you could combine suitable electrical stresses, with high temperature and humidity to test several stresses simultaneously.
Combinatory testing naturally has risks. Analysing why failures occur is more difficult and this can cause problems, especially, if unexpected failure mechanisms are seen. However, in comparison testing this is usually not a major issue and combinatory testing can help to accelerate the test significantly.
Test enough – but not too much
In a good situation both new and old components seem to have excellent reliability and no failures or changes are seen. This is of course something you hope to see. However, in this case it might not be easy to decide how much testing is enough and can be considered to cover the lifetime of the tested structure. This is often the case especially, if you are in a hurry and need to decide which is the minimum time required.
To estimate test duration, you can use simple reliability models. The models are not very reliable, but they are a good tool to study how the duration of the test relates to the use life in actual use conditions. Sometimes, you can also simply use product’s test requirements. Unfortunately, the decision is typically not easy to make.
Testing is time-consuming and costs money. However, even if you are in a hurry of finding a new component, we warmly recommend doing some comparison testing. It is much nicer to find the reliability problems in the early stages of the process than finding them as failures in the field.
Corrosion is one of the most common reason for failures, and the additional expenses due to it are counted in billions. Especially, in electrical applications corrosion can very quickly destroy the functionality of devices and in worst case be a major safety risk. Consequently, it is critical to know how to protect your products against corrosion and its effects.
Considering the importance of corrosion, it is not surprising that there is a lot of interest to find ways to determine how to protect products against corrosion. However, analysing the reasons for corrosion is not simple. The problem is that there are so many factors which affect corrosion. Some of them depend on the product itself. For example, some materials contain corrosive impurities which can cause problems in suitable conditions. However, many factors affecting corrosion depend on the environment the product is used or stored in. For example, air pollution or industrial exhausts can have significant effect on corrosion.
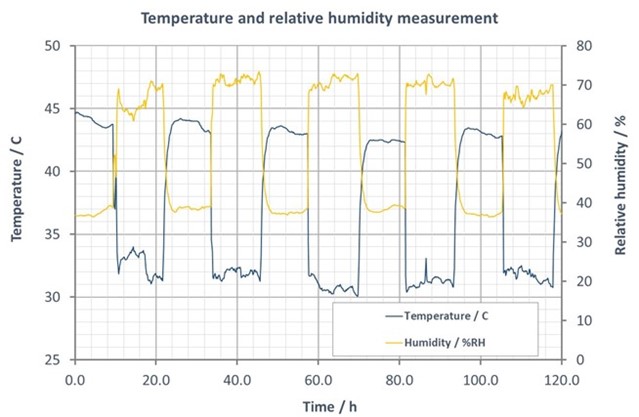
If you want to understand how corrosive your use and storage environments are, it would be important to measure them. Unfortunately, measuring corrosivity is not simple. Some environmental factors are quite easy to measure. For example, both humidity and temperature are critical factors for corrosion. In an excellent overview of corrosion by VTT, it is stated that relative humidity level of 40% is needed for corrosion to occur. However, if temperature reaches 40°C, corrosion can occur even with low humidity levels. Both humidity and temperature are relatively easy to measure using the numerous sensors available.
Relative humidity and temperature typically vary between day and night in outdoor conditions.
Unfortunately, most corrosive elements are far more difficult to measure. Typically, complicated and expensive measurement systems are needed to get proper results. Furthermore, corrosive elements may mask each other in measurements, making their analysis even more complicated. Moreover, you need to know what you are measuring to optimize the measurements for these elements. This might not be easy to determine.
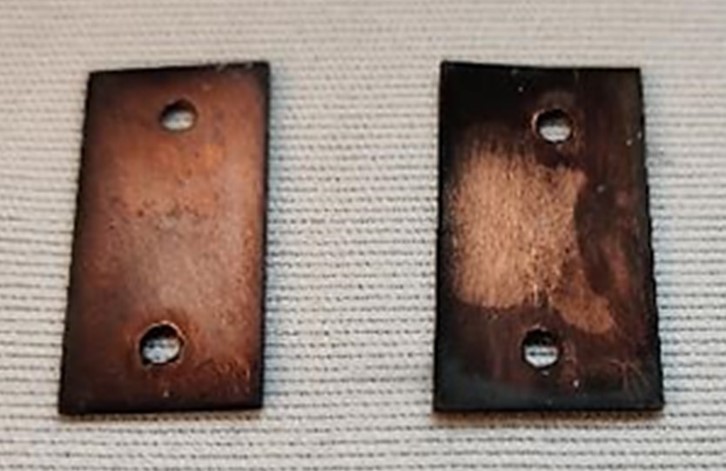
Corrosion coupons have been used for a long time to analyse the corrosiveness of environments. The idea is to use metallic coupon and expose it to the studied environment for a predetermined time period, for example a month. After exposure the amount of corrosion on the coupon is analysed and this information is used to assess the corrosivity level of the environment. There are several standards, for example ISO 9223:2012 and ISA S71.04-2013 which determine corrosiveness levels and help to understand how corrosive your use environments really are.
Copper corrosion coupons are commonly used to analyse the corrosiveness of environments.
The main drawback of corrosion coupons is that they do not enable in-situ monitoring and in order to get results you have to wait for a month or even more. However, there greatest benefit is that the coupon reacts to all corrosive elements in the environment. By using coupons made of different metals you can get quite easily get a good approximation of how corrosive the environment is. Coupons can be analysed using various techniques. In our corrosion monitoring device, we use weighing and coulometric reduction and occasionally also mass reduction analysis. The benefit of coulometric reduction is that it gives you information of the corrosion products and this information can give more information of the environment.
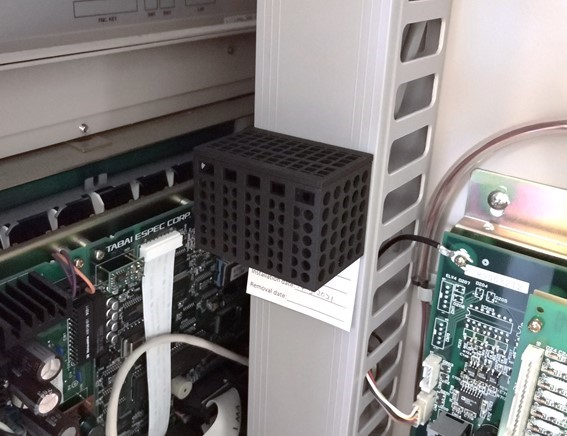
Trelic’s Corrosion Monitoring Cube can be used to study corrosiveness of many different environments.
So why should you measure the corrosiveness of environments? As stated in the beginning, corrosion is one of the most common reasons for failures which causes huge additional costs for companies. Early failures of products are also against the aim for more sustainable products. By analysing the use and storage environments you can understand the level of risk due to corrosion. This helps to determine how much protective measures are needed. Additionally, you can use this information in corrosion test design and to find the right test methods for your product. The correlation between the test conditions and real environments is not well understood but the detailed information for the corrosiveness is vital advantage for test design and helps significantly when you need to analyse failures from the field.
If you are considering how to test your product, a combined high humidity and high temperature test is probably one of the tests on your list. It is one of the most common accelerated reliability test methods, especially in electronics.
85/85 test is most likely the most common version of the combined humidity tests. In it a test temperature of 85°C and relative humidity of 85% are used. 85/85 test is often used in R&D phase, as both customers and R&D engineers are accustomed to use this test – it has always been used. However, for some materials and structures, 85/85 test is too harsh and causes failures which would never occur in the field. If you are using 85/85 test in such cases, you may get too pessimistic and incorrect results which can lead to poor design decisions.
Why is PET used?
As a plastic material, PET is probably best known for its use in water and soda bottles. However, in electronics it is often used as flexible substrate material in low-cost or in printed electronics applications. It has also been widely used in various display attachments. It is even used in many demanding industrial applications.
The popularity of PET is easy to understand. It is relatively cheap with good electrical properties, which makes it well-suited for flexible printed circuit boards (PCB) and cables. The main disadvantage of PET is its low glass transition temperate (Tg), preventing its use in applications requiring high use or manufacturing temperatures.
PET and 85/85 test
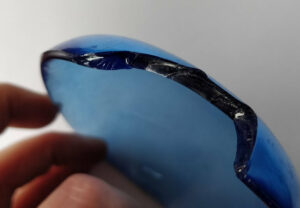
In the picture above, you can see a PET flex PCB with cracks penetrating through the flex. The question here is why did the PET film crack, which brings us back to the original question: Why is 85/85-test too harsh for PET?
The answer to the PET cracking is hydrolysis. PET is polyester material which means that it has ester groups in its polymer chain. When PET is exposed to environments combining high humidity and temperature above its Tg, hydrolysis of the ester groups occurs. This means that the polymer chains are broken (often called chain scission) which leads to embrittlement of the material and failures.
You can see another example of PET cracks in the picture on the left. In this one you can also see dark grey traces, which are the silver paste traces printed on the flex PCB. The black curves in the picture are the cracks in the PET film. In this case the cracks also propagated through the electrical wiring, breaking the electrical path of the wirings and causing a failure.
The PET flex in the picture has been exposed to a rather long 85/85 test. However, it is good to bear in mind that hydrolysis starts to brittle PET material already during a 500h test, and after 2000h the material will lose all its mechanical properties. The same problem often occurs with other ester-based polymer materials, such a PBT and PEN.
When hydrolysis occurs PET and other polyesters become brittle which can easily lead to cracking of the material.
Due to hydrolysis, 85/85 test will give too negative results of the reliability of your products, unless they face the 85/85 conditions in their use environment. But how to avoid this? By lowering the test temperature. Hydrolysis only occurs in humid environment exceeding Tg temperature of the polymer. As Tg of PET is typically around 70-80°C, hydrolysis can be avoided by testing the effect of humidity with a lower temperature humidity test or using a humidity cycling test. For example, combining a test temperature of 65°C and a relative humidity of 90%RH can be used with PET. The lower acceleration of the test may be compensated by increasing the test duration.
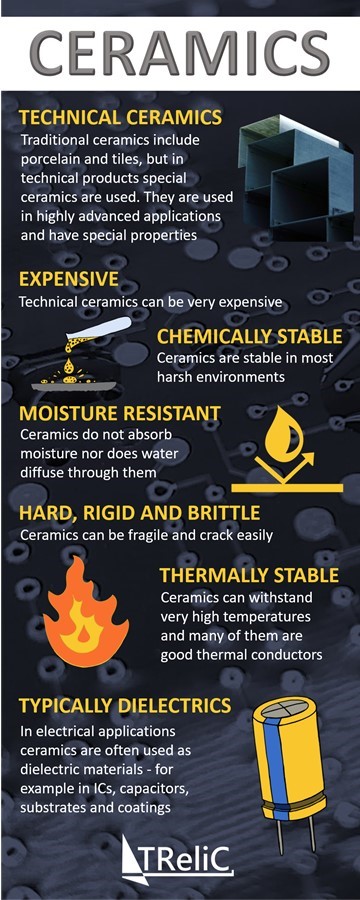
Material selection plays a crucial role in product development. Last week we shared an infographic about metals and their basic properties. This week we deal with ceramics. This material group is less known, but ceramic materials can be vital especially in applications used in demanding environments.
A few years ago, we were buying a new mobile router for my family. After the purchase, we quite soon realised that the router had some reliability problems, and it stopped working properly, when we had used it only for a very short time. The router worked okay after we restarted it, but every time it had been on for a while, it stopped working properly.
So, we took the router back to the store, where the clerk promised that they would check what was wrong. I was pretty sure that we had a device with an intermittent failure. Typical for such failures is that they occur only in suitable conditions and can cause very strange failure modes. Unfortunately, after service, the router did not work any better. Hence, we took it back to the store where it became clear they had done nothing, even though we had explained the problem. They had turned the router on, checked that it worked okay and decided that the router was fine. They were sure that the problem was in our system not in the router.
We repeated the service cycle again. However, after this the service clerk told me that there is not such thing as an intermittent failure, and this is not their problem. Luckily, we managed to return the router, go to another store, and buy a new one which worked perfectly without any failures.
I must admit that I was somewhat shocked by the service clerk’s attitude. Firstly, of course we got really bad service, but I was surprised that he had never had a device before with such issues and declared that they were not possible. Considering that intermittent failures are quite common in electronics, this was quite surprising. An intermittent failure basically means a failure which comes and goes but is not permanent. Since electronics devices are very complex, there are plenty of potential reasons for such a failure to occur.
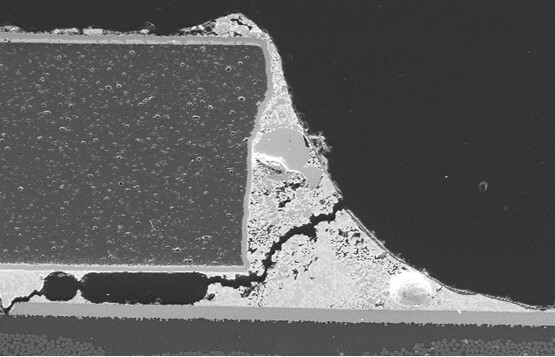
Intermittent failures may appear, for example, due to cracks, relaxation of plastics, migration of materials, corrosion, and bad connectors. In testing we commonly see these failures when a crack occurs in a suitable interconnection. A crack in a solder joint may lead to a situation, in which the joint is closed at high temperatures, but bending due to temperatures below zero opens the joint, and the device does not function as it should. Even more common is that during thermal cycling testing the interconnection is closed at high and low temperatures, but during the change of temperatures the interconnection is open, and the device does not work. In the picture below an example of a cross-sectioned cracked solder joint is shown.
Cracks in solder joints can cause intermittent failures which are seen in suitable environmental conditions.
In Trelic, we do lots of different accelerated life tests which mean we expose test structures, components, or whole devices to different environmental conditions. Quite often a test with fluctuating test conditions is involved. During testing we prefer to measure the functionality or the electrical signals of tested components and devices in-situ. This way we can see in real-time how failures occur and are they permanent or not i.e. can we see the failure both during and after the test.
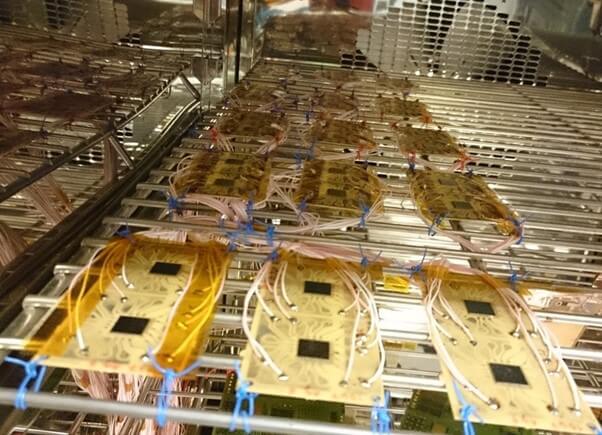
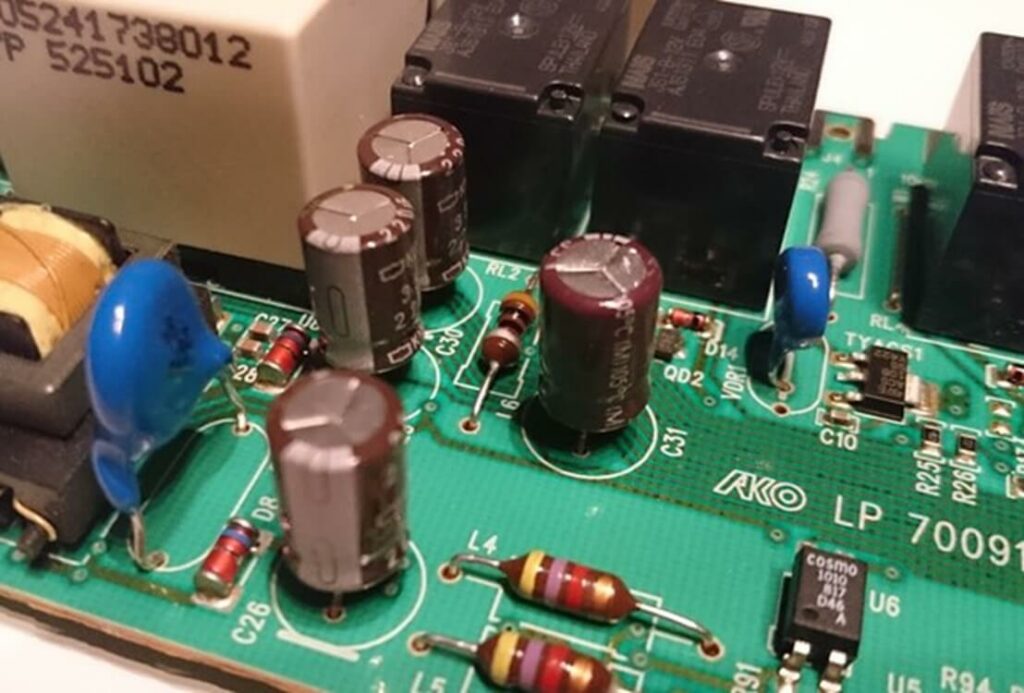
Quite often we see failures which occur only at low or high temperature or at high humidity. Even though the samples show a failure during the test, after testing they may function perfectly fine, and no indication of any failures is seen. It is not uncommon that in these situations our customer mentions that such failures have also be seen in real use conditions as intermittent failures and they have not been able to determine the reason for them. In this case it is of course great that we have been able to imitate the failures because we can then start to analyse what is causing them. One of the main problems with intermittent failures is that their location and cause is difficult to define. Additionally, they may be very hard to replicate. For example, as shown in the picture below, electronics have lots of components with different polymers and plastics, which makes them vulnerable to intermittent failures due to humidity and such failures may typically be difficult to find.
Electronics devices have lots of plastic and polymer parts which can absorp moisture. This can cause relaxation, swelling, and warpage of materials and lead to intermittent failures
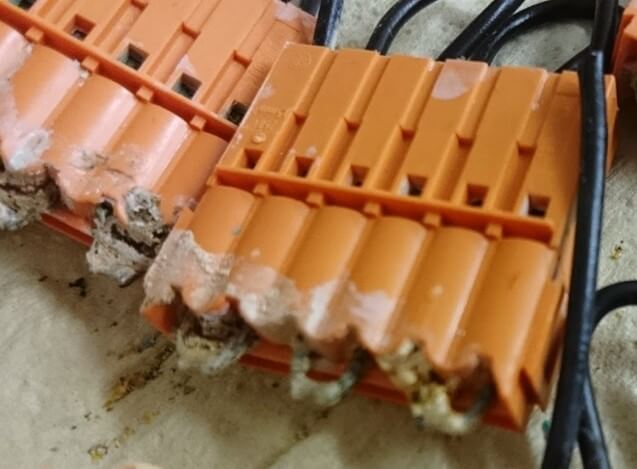
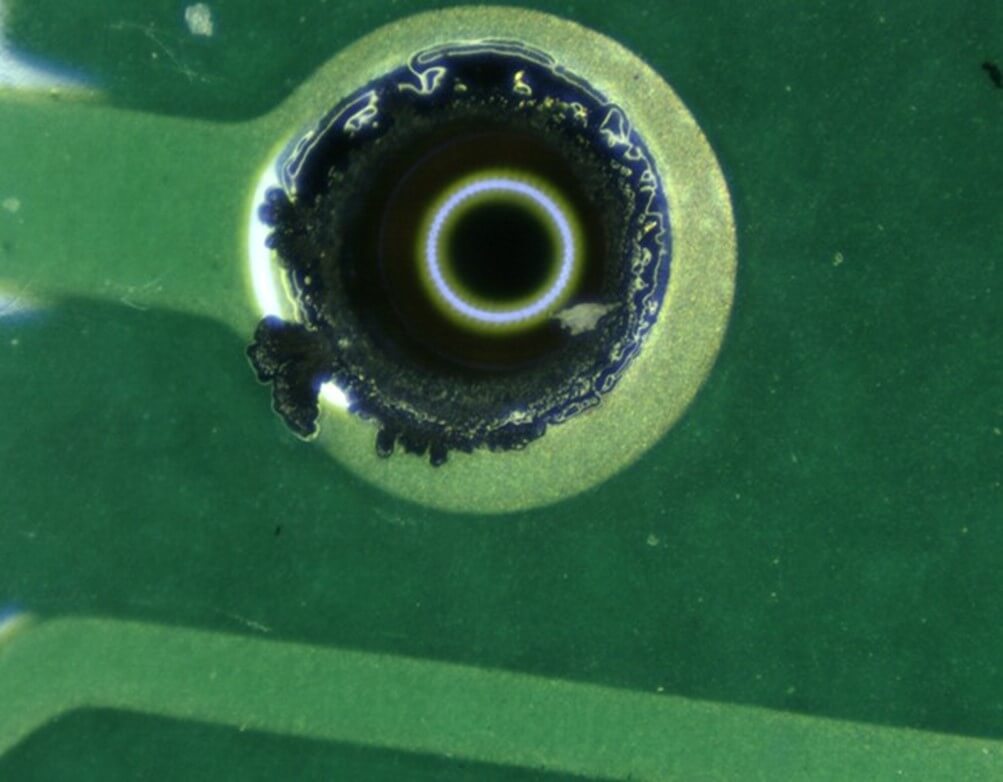
An intermittent failure can also be a real challenge for in-depth failure analysis (read more about failure analysis here), sometimes even a nightmare, as the heading says. When a failure occurs, for example, only at very high humidity and temperature, it is typically not seen at room conditions. However, it is difficult to study a device at such high humidity and temperature conditions to determine the exact location of the failure. Furthermore, detailed failure analysis techniques can usually be only used at room conditions and it is possible, that because of this, it is impossible to confirm the reason for the failure. In the picture below a corroded copper plated via is shown. Corrosion may be one of the reasons causing failures which are difficult to locate or cause instability to connections.
Corrosion is a typical reason for failures in electronics and sometimes failures caused by it are intermittent. For example poor contact due to corroded contact material may cause intermittent failures.
Unfortunately, intermittent failures are common in electronics and cause problems in reliability analysis. Nowadays, there is also a risk that such failure is caused by combined hardware and software problems, which makes it even harder to analyse their reasons and locate the original cause. As I mentioned before, one way to analyse and find such failures is to measure the functionality of the device and age them in various environmental conditions. If this is done already in product development, the risk of intermittent failures is significantly reduced. If failures are seen in the test conditions, they can be further studied, and the test conditions already give important clues about the problems and reasons for them. Building electrical set-ups for electrical measurements during environmental testing is sometimes time consuming, but typically well worth the extra information gotten.
We use cookies to optimise our website and our service.
Functional
Always active
The technical storage or access is strictly necessary for the legitimate purpose of enabling the use of a specific service explicitly requested by the subscriber or user, or for the sole purpose of carrying out the transmission of a communication over an electronic communications network.
Preferences
The technical storage or access is necessary for the legitimate purpose of storing preferences that are not requested by the subscriber or user.
Statistics
The technical storage or access that is used exclusively for statistical purposes.The technical storage or access that is used exclusively for anonymous statistical purposes. Without a subpoena, voluntary compliance on the part of your Internet Service Provider, or additional records from a third party, information stored or retrieved for this purpose alone cannot usually be used to identify you.
Marketing
The technical storage or access is required to create user profiles to send advertising, or to track the user on a website or across several websites for similar marketing purposes.
 To estimate test duration, you can use simple reliability models. The models are not very reliable, but they are a good tool to study how the duration of the test relates to the use life in actual use conditions. Sometimes, you can also simply use product’s test requirements. Unfortunately, the decision is typically not easy to make.
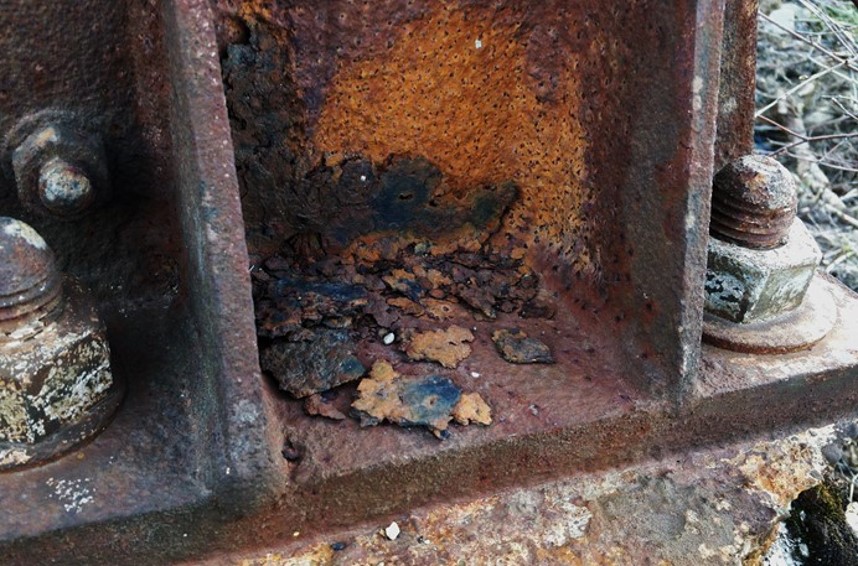

 The answer to the PET cracking is
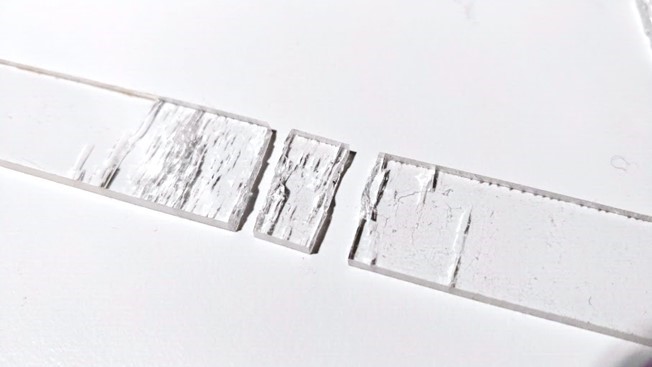


Recent Comments